This article is the continuation of the previous article on MediaPipe Face Mesh model in TensorFlow.js, where we looked at creating the triangle mesh of the face using the model’s output. Here, we will look at detecting and tracking iris within the eyes using the MediaPipe Iris model.
1. Iris Detection
MediaPipe Iris model accurately estimates the iris landmarks within the eye and tracks it. Iris detection & tracking can be used in augmented reality to create avatars and also to determine the distance of the camera to the user.
It also provides a more accurate estimation of the pupil and eye contours which could be used to detect blinking of eyes.
MediaPipe Iris is an optional model that gets loaded when we load the Face Mesh model. The faceLandmarksDetection.load() method takes two arguments -
- package - currently only mediapipeFacemesh is supported.
- packageConfig - a configuration object in which multiple properties can be configured. In our context, we are interested in the below property.
- shouldLoadIrisModel - Boolean flag that determines whether to load the MediaPipe Iris model. The default value is true.
MediaPipe Iris model, when loaded, provides an additional 10 points that mark the iris position within the eyes - 5 points for each eye. So, the model would predict a total of 478 3D landmark positions when the Iris model is optionally loaded.
Let’s use the HTML (index.html) and JavaScript file (index.js) that we already created as the base to start with and add an additional method to handle the extra 10 points provided by the Iris model. Please refer to the first article in this Face Mesh series, to understand the existing contents of these two files.
1.1 HTML file - index.html
We define the video and canvas elements along with loading all the required scripts for the Face Mesh model.
1.2 JavaScript file - index.js
In the index.js file, we set up the webcam camera & canvas, load the FaceMesh model, predict the facial landmarks and render those predictions.
One point to note is that, we can control the Iris detection using an input parameter, when we invoke the model.estimateFaces() method to predict the faces and its landmark positions. The model.estimateFaces() method takes a config object as input. This config object contains an input parameter named - predictIrises - which is a boolean flag that determines whether to return the positions for the irises. The default value for predictIrises parameter is set to true.
Since predictIrises parameter defaults to true, we are not setting this parameter explicitly in the below code when we invoke the model.estimateFaces() method during prediction (in renderPrediction() method).
1.3 Display the Iris landmarks
Let’s create a function named displayIrisPosition() to display just the 10 points marking the landmarks of the irises. This function takes the Face Mesh model’s predictions array output as input.
Loop through the predictions array and from the prediction object, get the prediction.scaledMesh attribute and assign it to keypoints. The prediction.scaledMesh attribute contains the positions of the 478 3D predicted landmarks scaled to the input video’s width and height. The last 10 points (index 468 to 477) contain the positions for the irises.
Loop through the last 10 points in the keypoints array, and draw a rectangle at those points. The output will look something like below.

Iris detection
2. Detect blinking of the eyes
As mentioned earlier, the MediaPipe Iris model also enables a more accurate estimation of the pupil and eye contour regions, which could be used to detect blinking of eyes.
Let’s create a function named detectBlinkingEyes() to detect and count the number of times a person blinks their eyes. This function too takes the Face Mesh model’s predictions array output as input, similar to the previous function that we defined to display the irises landmarks.
We will utilize the below annotations from the prediction output that provide the points that together mark the outline of the eye.
- prediction.annotations.rightEyeUpper0
- prediction.annotations.rightEyeLower0
- prediction.annotations.leftEyeUpper0
- prediction.annotations.leftEyeLower0
We will take the two specific points per eye for consideration to detect the eye blink - the middle point in the upper and lower part of the eye outline for each eye. The index positions for these points are given below.
- 4th point in the rightEyeUpper0 and leftEyeUpper0 array (index 159 and 386 respectively in the 478 points prediction array)
- 5th point in the rightEyeLower0 and leftEyeLower0 array (index 145 and 374 respectively in the 478 points prediction array)
Consider the eye as closed if the distance in y axis between the upper and lower points falls below 7. We increment the eyesBlinkedCounter, if in the next frame, the distance in y axis between these points is above 9 (which is considered as eyes opened after it was closed). The eyes closed and subsequently opened are considered as eyes blinked and the counter is incremented accordingly.
The distance constraint given above might need to be calibrated based on the height of the video input.
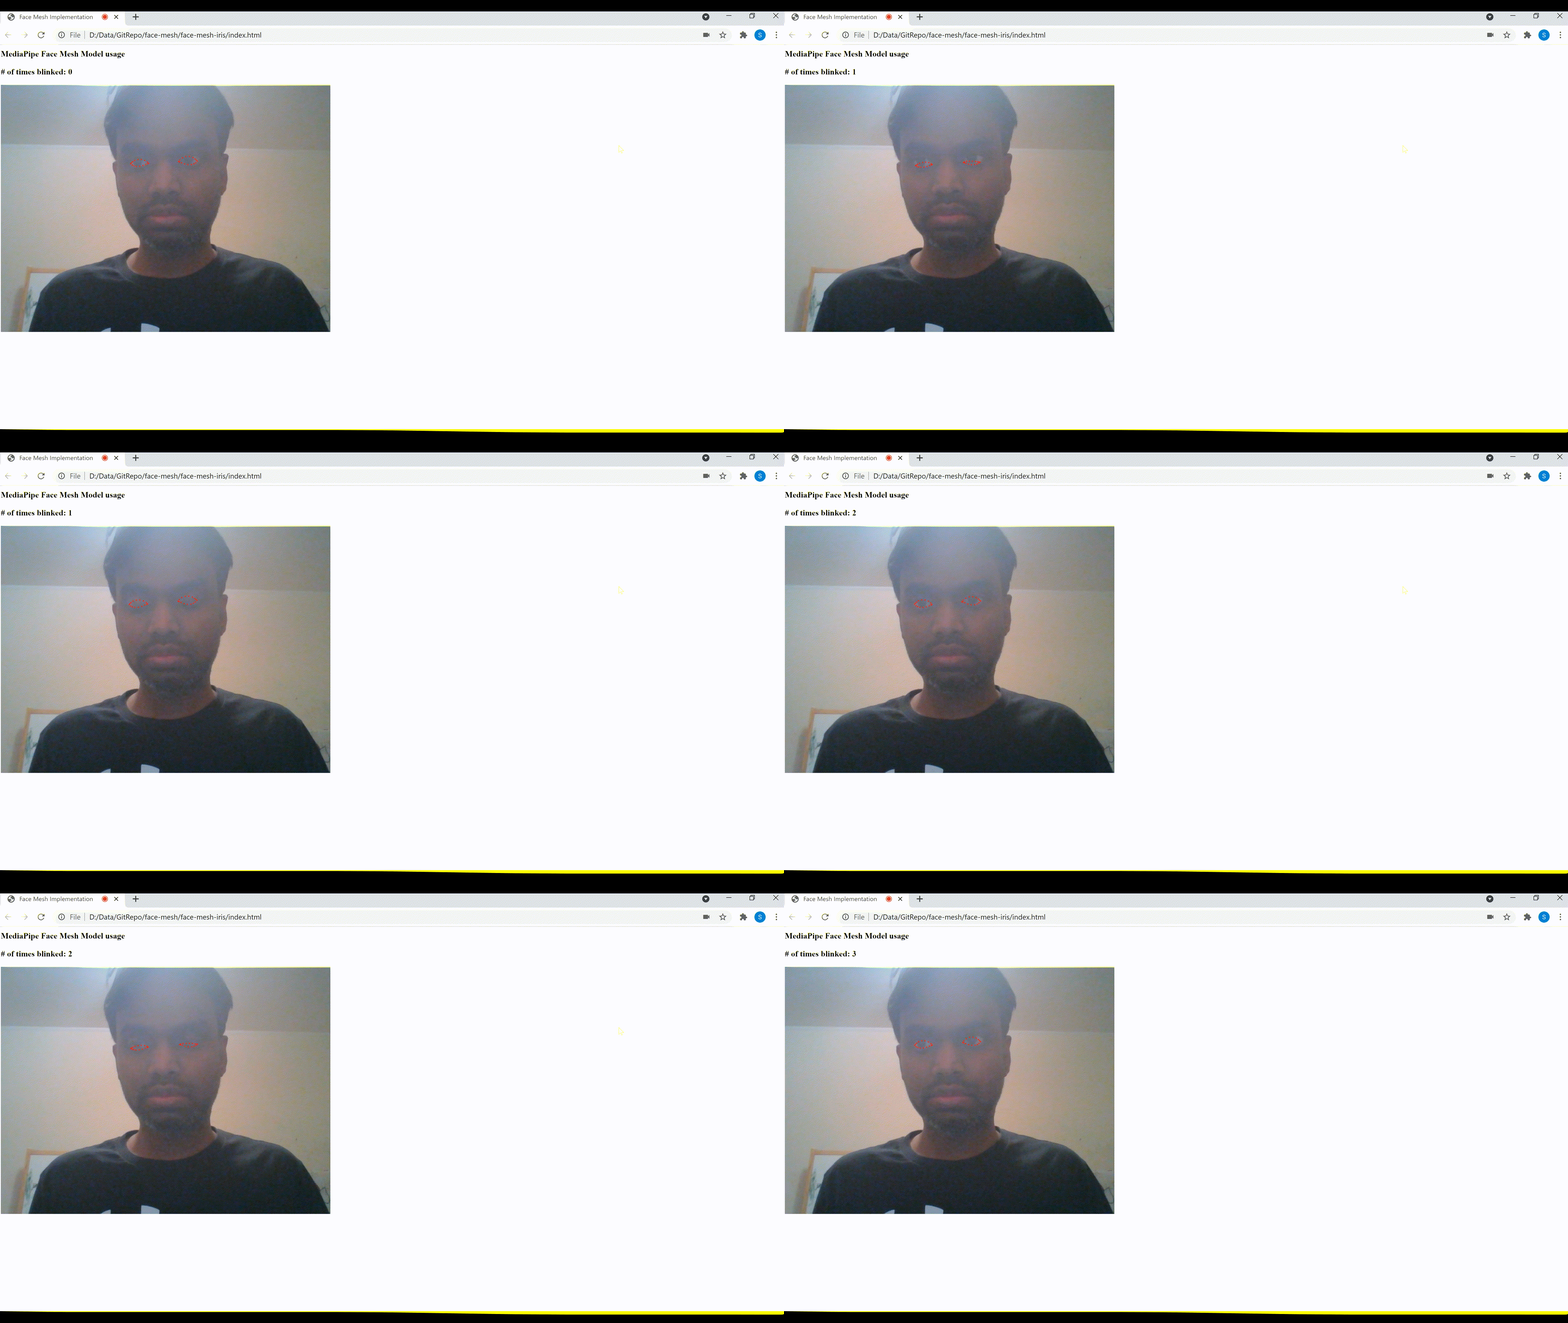
Let’s concat the array of points from the above 4 annotations and loop through them to display a small dot at those points marking the outline of the eye.
The output looks something like below.

Eyes blink detection and count
That’s it for iris tracking and detecting landmarks around the eyes. The source code for this example can be found in this Github repo . Happy Learning!
3. References
- Face Landmarks Detection package in TensorFlow.js pre-trained model’s Github repo.
- MediaPipe blog on Face Mesh model .
- MediaPipe blog on Iris model .
- Google AI Blog: Real-Time AR Self-Expression with Machine Learning
- TensorFlow Blog: Face and hand tracking in the browser with MediaPipe and TensorFlow.js