
It is always best practice to use virtual environments while working on Python projects. This article lists the steps to run Jupyter Notebook within a virtual environment.
In a nutshell, these are the steps required to run Jupyter Notebook in a virtual environment.
Install Jupyter
Create a virtual environment and activate it
Install ipykernel package
Install a new Jupyter Kernel
Run Jupyter Notebook
Change the Kernel in Jupyter Notebook to the one we installed in the virtual environment in Step 4
Let’s look at each of the above steps in detail.
1. Install Jupyter
First let’s install Jupyter in the system by running the below command.
pip install jupyter
2. Create a virtual environment and activate it
Run the below commands to create a virtual environment and activate it.
python3 -m venv myenv

#For Linux/MacOS
source myenv/bin/activate

#For Windows
. myenv/Scripts/activate
3. Install ipykernel package in the virtual environment
We will install a new Jupyter Kernel in the next step and to do that we need to install the ipykernel package first. Run the below command to install the ipykernel package in the virtual environment.
Note: This is the key step in the entire process! If we don’t install this package in the virtual environment, then when we try installing the kernel (ipython kernel install –user –name=myenv), the system will use the ipykernel package from the system level Python installation. So, the new kernel will not point to the virtual environment, instead point to the system level Python installation and use the dependencies from there.
pip install ipykernel
4. Install Jupyter Kernel in the virtual environment
Ipykernel is the Jupyter Kernel for executing Python code and it is already available as the default kernel in Jupyter Notebook. But the default kernel could not use the dependencies we install in the virtual environment. So, we would need to install a new Jupyter Kernel within the virtual environment and use that in the Jupyter Notebook instead of the default one.
Run the below command to install a new Jupyter Kernel in the virtual environment.
ipython kernel install --user --name=myenv
5. Run Jupyter Notebook
Run the below command to run Jupyter Notebook
jupyter notebook
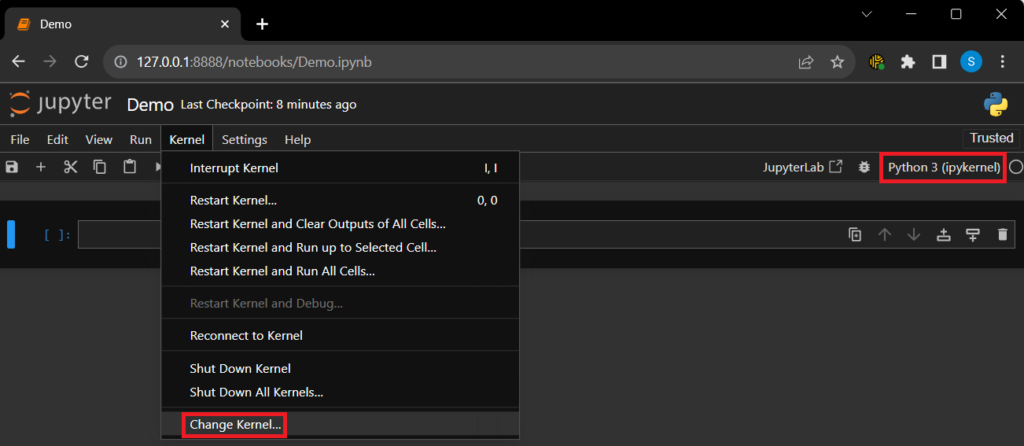
6. Change the kernel in the Jupyter Notebook
Create a new Jupyter Notebook in the browser. To change the Kernel, either navigate to the Kernel → Change Kernel option in the menu or click on the Python 3 (ipykernel) in the top right corner.
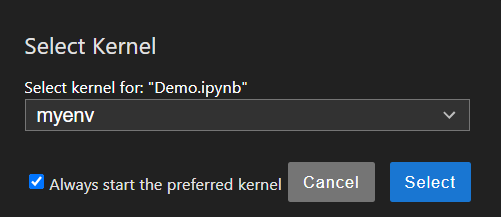
In the Select Kernel popup, select the myenv kernel that we installed earlier in the virtual environment and click the Select button.
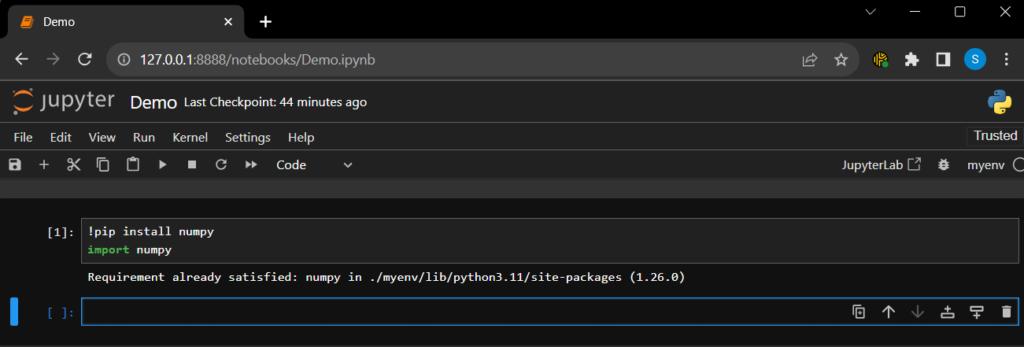
Once all the above steps are done, installing any package in the Jupyter Notebook would get installed in the virtual environment and the Jupyter Kernel would be able to use those dependencies.
For example, install numpy and import it as below. The numpy dependency would have been installed in the virtual environment and the import should work.
!pip install numpy

import numpy
Happy Coding!