In Computer Vision, one of the main challenges is to understand an image at a higher level like the way we humans do, i.e., to identify the objects, their location and their surroundings to make sense of the scene captured in the image. Semantic Image Segmentation is the process of identifying the objects present in the image and labelling each pixel by associating it to an identified object class. Semantic Image Segmentation can be applied to a wide variety of use cases such as human body segmentation, separating the background from foreground in an image, and understanding the surroundings for self-driving cars, just to name a few.
The DeepLab v3 model made available as part of the pre-trained models in TensorFlow.js can be used to perform Semantic Image Segmentation in the browser. The inference happens within the browser, so the user privacy is maintained by not sending the data to backend servers.
The DeepLab v3 model in TensorFlow.js is packaged with three pre-trained weights, corresponding to the datasets that they are trained on - Pascal , Cityscapes and ADE20K datasets. Refer to this file , to understand the list of object classes that each of these pre-trained weights identify.
1. Overview
In this article, we will create a simple UI that allows us to upload an image and use DeepLab TensorFlow.js model to perform semantic image segmentation within the browser.
Let’s start with building the UI first.
2. Build the HTML file
Let’s create a HTML file named index.html. This simple UI allows the user to
- Load the model with any of the three available pre-trained weights
- Upload an image and perform image segmentation
- Display the output in a separate canvas along with the legends of the identified objects
2.1 Install DeepLab model
Load the below list of scripts, to load the DeepLab v3 model and its dependencies. The last script loaded here - index.js - is the one we will build for this example.
2.2 Add UI components
Let’s add the below UI components to the page.
- A drop down to select the model name to load
- A button to load the model
- File Input to upload an image
- A button to execute the model inference to perform image segmentation
- An image element to display the uploaded image
- A canvas element to display the output segmented image
The full code of the HTML file is given below.
The UI will look as below for the above given HTML code.
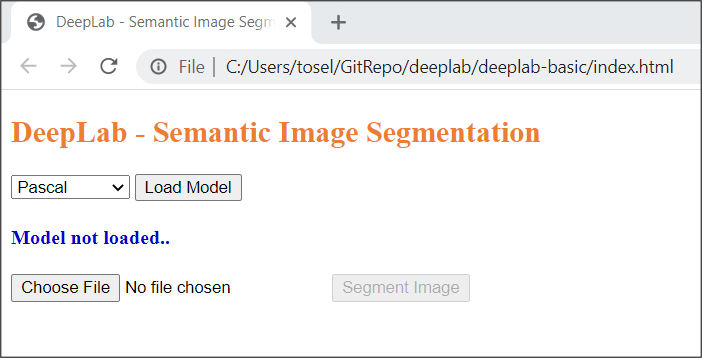
UI for this example
3. Build the JavaScript file
Let’s create a new JavaScript file named index.js. This file will contain all the logic required for this UI.
The deeplab global variable is made available by loading the deeplab.js script in the index.html file. This variable can be used to invoke all the functions required to work with the DeepLab model.
3.1 Declare the variables
Declare the global variables that are required in the code logic and also for holding the references to the UI elements.
3.2 Load the DeepLab model
We will load the DeepLab model on click of the “Load Model” button based on the model selected in the model dropdown.
Load the DeepLab model by invoking deeplab.load() function that accepts a configuration object as input. We will use this config object to specify the model name to load and the quantizationBytes is hardcoded to 2.
Quantization is a technique that reduces the model size to improve the CPU and other hardware performance while compromising a little on the model’s accuracy.
The quantizationBytes input parameter refers to the degree to which weights are quantized. The possible options are 1, 2 or 4. Setting this parameter to 1 or 2 will load the model with int32 and float32 compressed to 1 or 2 bytes respectively. Setting it to 4 will disable quantization.
Once the model is loaded, we will update the status in the UI that the appropriate model is loaded.
3.3 Image upload and display
The below code is used to handle the image uploaded by the user using the File Input option and display it in the image element.
3.4 Prediction - Image Segmentation
As a next step, let’s perform the prediction by applying the DeepLab model on the uploaded image. Create a function named predict() that will be invoked on click of the “Segment Image” button in the UI.
Invoke the model.segment() function by passing the image element as input. model.segment() function returns a promise, so use await to get the output prediction object.
Use the output prediction object to invoke the renderPrediction() function to render the output segmented image on a canvas.
3.4.1 Model output prediction object
Let’s understand the contents of the prediction object before moving on to rendering the output image using this object. A sample prediction object is given below.
{
    "legend": {
        "background": [ 0, 0, 0 ],
        "person": [ 192, 128, 128 ],
        "motorbike": [ 64, 128, 128 ]
    },
    "height": 385,
    "width": 513,
    "segmentationMap": {
        "0": 0,
        "1": 0,
        "2": 0,
        "3": 255,
        "4": 0,
        "5": 0,
        "6": 0,
        "7": 255,
        "8": 0,
        ..
        "790016": 0,
        "790017": 0,
        "790018": 0,
        "790019": 255
    }
}
At a high level, the output prediction object contains 4 attributes within it.
1. legend
The legend attribute refers to an object that contains the r, g, b color values for each of the identified object classes.
2. height and width
The height and width attribute refers to the height and width of the output image after segmentation.
3. segmentationMap
The segmentationMap attribute refers to an object that contains the pixel wise labelling by providing the color code for each pixel in the image based on the object identified at that pixel. Basically the object corresponds to the data attribute of the ImageData
object.
For every pixel, the ImageData object contains 4 values
- R - the color red (0 to 255)
- G - the color green (0 to 255)
- B - the color blue (0 to 255)
- A - The alpha channel (0 to 255; 0 is transparent and 255 is fully visible)
As a summary, in the above example,
- The output image data was of the size 513 X 385 (width X height).
- Total pixels = 197505 (by multiplying, 513 * 385)
- The segmentationMap object contains 790020 values. 4 values (RGBA) for each of the 197505 pixels (197505 * 4 = 790020)
3.5 Render the prediction - segmented image
Create a function named renderPrediction() which accepts the model’s output prediction object as input.
3.5.1 Render the segmented image
Create an instance of ImageData using the segmentationMap, width and height attributes from the prediction object. Display the output image by utilizing the HTML Canvas’ context.putImageData() function.
Please make sure to set the height and width of the canvas element to that of the input image, so that the output image is displayed with the same size as the input image.
Invoke displayLegends() function and pass the prediction.legend object as input.
3.5.2 Display the legends for the segmented image
Create a function named displayLegends() which accepts the prediction.legend object as input. Loop through the prediction.legend object and for each key, create a HTML Span element and set its color using the array containing the r, g, b color values. Set the text of the Span element using the object key which corresponds to the class of the identified object.
4. Conclusion
The output should look something like below.
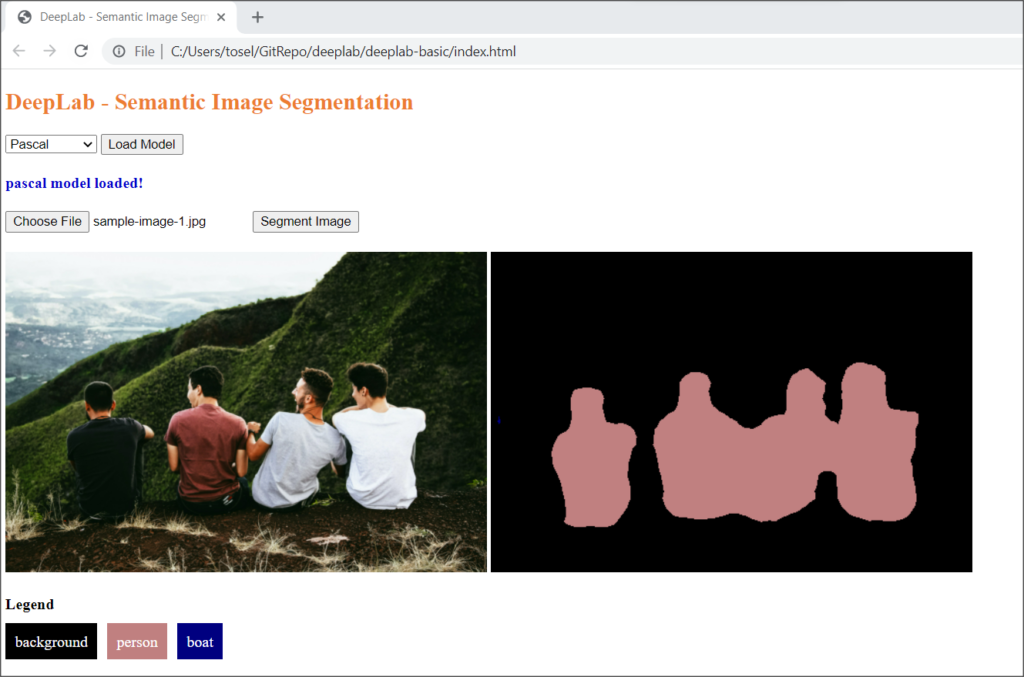
DeepLab Model - Semantic Image Segmentation output
The source code for this example is available in this Github repo .
So, with this we have understood how to use the DeepLab model and saw the contents of the model’s output prediction object in detail. Thanks for reading and happy learning!
5. References
- Github repo - Repository of the DeepLab v3 model in TensorFlow.js pre-trained model
- Github repo - Repository of DeepLab v2 model in TensorFlow library
- Image Segmentation - Wikipedia
- Quantization - Post training quantization from TensorFlow website