In this article, we will walk through an example to identify facial landmarks using the state of the art MediaPipe Face Mesh model . This model is present in the Face Landmarks Detection package in TensorFlow .js library’s pre-trained model suite.
This is part 1 of a series of articles in which we dive into the details of the Face Mesh model and its usage.
1. Overview
The MediaPipe Face Mesh model estimates 468 3D facial landmarks in real time covering the overall surface geometry of a human face. It also supports Iris detection that accurately tracks the iris within the eye. Iris detection when enabled provides an additional set of 10 landmarks - 5 points for each eye.
This model is part of the Face Landmarks Detection package in TensorFlow.js and is the only model supported as of today.
We will go ahead and implement a simple example utilizing the Face Mesh model.
2. Implementation
In this example, we will detect the facial landmarks on a webcam video stream input in the browser and draw all the 468 landmarks on top of the detected face.
The code for this example is present in this Github repo .
2.1 Build a HTML page
Create a new file named index.html. This will act as the placeholder for the HTML video and canvas elements along with loading the required scripts for the Face Mesh model.
The video element is hidden and only the canvas is visible which we will use for drawing the detected facial landmarks. We flip the image horizontally as by default the webcam video image is horizontally flipped.
2.1.1 Load the scripts
Load the below required scripts for loading the Face Mesh model and its dependencies.
Dependent Scripts
<script src="https://unpkg.com/@tensorflow/tfjs-core@2.4.0/dist/tf-core.js"></script>
<script src="https://unpkg.com/@tensorflow/tfjs-converter@2.4.0/dist/tf-converter.js"></script>
<script  src="https://unpkg.com/@tensorflow/tfjs-backend-webgl@2.4.0/dist/tf-backend-webgl.js"></script>
Face Landmarks Detection package in TensorFlow.js
<script src="https://unpkg.com/@tensorflow-models/face-landmarks-detection@0.0.1/dist/face-landmarks-detection.js"></script>
This example app’s script
<script src="simplified_face_mesh_implementation.js" defer></script>
The complete code for index.html file is given below.
2.2 Build a JavaScript file
Create a new file named index.js and let’s walk through the steps required to use the face mesh model.
2.2.1 Declare the variables
Declare the variables to hold the reference to the HTML elements and few other variables that will be used throughout the program.
2.2.2 Set up the camera
In the setupCamera() async function, set up the webcam camera using navigator.mediaDevices.getUserMedia() function. This function returns a promise which we resolve to the video object within the video.onloadedmetadata callback function.
Set the video element’s height and width to make it display using the size dimensions specified in the HTML page. If this is not set explicitly, the video element will take the default 640X480 size.
2.2.3 Set up the canvas
In the setupCanvas() async function, set the height and width of the canvas to be the same as that of the video element.
Get the 2D context object from the canvas and flip it horizontally so that it aligns with the video object as that is flipped already.
Set the context object’s fillStyle attribute to green, to draw the facial landmarks in green color.
2.2.4 Load the MediaPipe Face Mesh model
Next step is to load the Face Mesh model from the Face Landmarks Detection package in TensorFlow.js. Note that currently, the Face Landmarks Detection package in TensorFlow.js only provides support to the MediaPipe Face Mesh model.
We use the object faceLandMarksDetection (which is made available by loading the script face-landmarks-detection.js) to invoke the load() function which loads the Face Mesh model. We can provide a config object with a list of input configurations to the faceLandmarksDetection.load() function.
Since this is a simple example, we will just provide one input config, maxFaces, which basically limits the number of faces we want the model to detect. In this case, we set it to 1, to detect just one face.
In the next series of articles we will delve in more detail and look at the different input configurations available while loading the Face Mesh model.
2.2.5 Render the Predicted Facial Landmarks
The renderPrediction() function is the key function which will be invoked to predict the facial landmarks. Pass this function to the window.requestAnimationFrame() function, so that it will be invoked for each frame of the video stream.
Invoke the model.estimateFaces() function to predict the face and the facial landmarks. This function takes a config object as its input parameter. Set the video object as input which provides the current video frame image as input to the model.
Set predictIrises config to false, to disable Iris tracking, which will reduce the time taken in the overall inference process. If set to true, the model will output an additional 10 landmarks for tracking iris in both eyes and take a little more time to return the prediction.
Draw the current frame of the video on the HTML canvas.
The output predictions object structure of the Face Mesh model is given below. We will look at each of the elements in this structure in detail in the next set of articles. In this example, we only make use of the prediction.scaledMesh object which provides the list of 3D (x, y, z) coordinates for the 468 facial landmarks.
Click here for a complete sample prediction object.
Loop through the predictions array. Since we set the maxFaces config to 1, the predictions array will contain only one prediction object for the single face that it detected.
Get the prediction.scaledMesh object which contains the 468 3D points for the detected facial landmarks. Loop through each of those points, and get the x and y values to draw a small circle at that point. This should display a small circle (a dot) at each of the 468 predicted landmarks overlaying the face on the canvas.
2.2.6 Putting it all together
Finally, let’s write a main() function, to invoke each of the above defined functions in the order it needs to be invoked. Invoke the main() function which will be invoked once the page loads.
2.2.7 Output
Below is a snapshot of the output of this example.
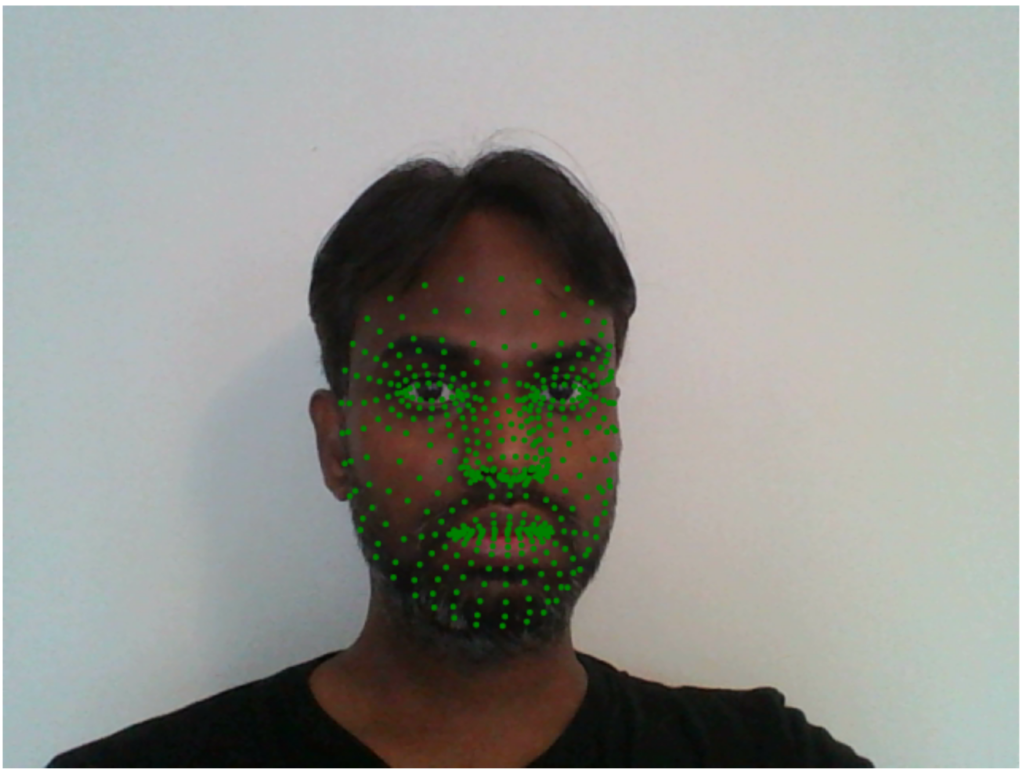
Face Mesh Landmarks drawn on the image
That’s it for using the Face Mesh model and drawing the predicted facial landmarks on a live video stream in the browser.
3. References
- Face Landmarks Detection package in TensorFlow.js pre-trained model’s Github repo.
- MediaPipe blog on Face Mesh model .
- MediaPipe blog on Iris model .
- Google AI Blog: Real-Time AR Self-Expression with Machine Learning
- TensorFlow Blog: Face and hand tracking in the browser with MediaPipe and TensorFlow.js